Monday 24 June 2013

Evaluation

At the beginning of the year Jack was given a brief that he had to produce work from. He had a target to produce the work to a certain type of audience e.g. Students from the departments of Mc tech to whether they are male or female and if they were interested in photography.
Jack's work was handed in past his deadline but he has put more detail into his work. I would say Jack has enjoyed photograph as you can tell from this work and the effort to his pictures as he loves taking pictures.
Jack created four images that he was really happy with they show a lot of how good he can take pictures and use different settings of a camera e.g. Lighting,zoom,colour,focus and how to have hold of a camera to get the right angle.

When jack started this assignment he wasn't very well over about 3 weeks which mean he lost out on a lot of time doing recce pictures, because he had lost out on all this time he had to use some of the images that the lecturer had shot he used these images as his ideas and then he come to choosing his own he used the same style but took his own images, I think that the images that jack Hugill had produced are really good I like the fact that he has concentrated on the shows on the images that he shot in the studio, the lighting that jack Hugill had placed around the engineering boxes he was using.

When he was shooting his work he used different equipment for his different shoots he used different types of lighting, if you look at the images that he has passed on to his lecturer jut by looking through his images you can see that he has chosen different lighting sources for example on one of his images he used a snoot so that he could get the lighting to shine in a exact place and in other I,ages that he has taken he has used a soft box and just a plain light bulb to give off a lot of light to create big shadows, he wanted to the lighting to shine from the side of the images to create big shadows.

I think jack Hugill could of took a little bit more time on the images he had taken I think he has got the potential in his work, I think he just needs a little bit more pushing to get his work on time if he had that little bit more momentum, I think he could have done different types of images on his work instead of doing all in studio work i think some work from a different parts of the college would have been a great addition to his portfolio and a great addition for the mc tech part of the college what the students have been working in on, jack needed to edit it his images a little bit more for when he gave them in to the ledturer he may have needed to crop a few more inches of one of s images.

But i think his work turned out pretty well after all the time he had wasted next time he should concentrate more on his work instead of other things. 


Thursday 20 June 2013

4 Different applications of Photogrpahy.
 In our photography lesson we go asked to do a assignment about different applications of photography we got given our topics and i got wildlife photography which will be further down in my blog so after the class had finished all the blogs we had to present them to the class after we presented to the class we had to choose 4 different applications and make a post about what we had learnt about each application. i chose Cosplay, still life, landscape and Advertising,


blog links 

http://bethsigsworth-photography.blogspot.co.uk/

http://www.kerryphoenixphotography.blogspot.co.uk/

http://benhewardphotography.blogspot.co.uk/

http://leahmarie-photography.blogspot.co.uk/


cos-play photography 

cosplay photography is based on costume role play, this type of photography is based on people dressing up like one of there favorite character from a Japanese animated series which is played on the telly, internet or even video game. most cosplay photography is done at anime conventions, which means all the fans that go to conventions dressed up are pretty much the models for cosplay photography some of the cosplay outfits are so realistic some of the fans who dress up some times wear wigs and the costumes hey were are pretty much complete replicas of their most popular characters. cosplay is a mix between fashion and photography which is both classed as part of the art and design course, when the people dress up cosplay they usally go all out and buy/create the full costume right down to the exact tee which could mean they could be wearing multiple layers and even have the weapons or accessories, even though anybody can go to the conventions if they buy a ticket and take photos but the photographers that go to make money can indeed sell the photos that they have taken on the day as there own copyrighted images they even name the price that they want for the images that have been taken. cosplay dosnt have a exact style of images that the photographers take they can take the image anyway they want of they want to put the image in black and white, small or large its all down to how the photographer feels on the day of taking the shot, when cosplay photography first started it was done by people just for a hobby but now photographers actually get hired by the convention to try and get the best images for the convention to advertise what has been happening at one of there meetings to try and attract more people to the conventions.


 still life photography

still life photography became popular in the 1900s and is still a really popular photography application in today's day. when painters like Vincent van gogh were painting still life paintings it was giving photographers the inspiration to go out and shoot still life photography, still life photography was a choice and a very creative choose at that. back in the day the expose was measured in minuets instead of seconds because of this photographers chose to do still life photography because if they try to get anything that was moving they wouldn't have time to take the image because the shutter speed was so slow, the still life photographers likes taking still life because they could put there own objects they wanted in the pictures. anthoer freedom about this is the photographer can go anywere he wants and have a wide range of different backgrounds which would make the images even more superb.


Advertising.


advertising photography is one of the most common sectors of commercial photography. the best way to explain advertising photography, this type of photography is mostly used for advertising fashion. food, cars, houses, companies. there is a million different businesses in advertising they use A lot of different photographers to get what they want for their business, they advertise through photography for advertising so they can show what objects they are advertising which will make the ratings higher and the more sales will come through because people have seen what the product looks like and they might be interested in buying.

Jonathan Knowles

this is one of the most popular advertising photographers he got so popular because of his most looked at work which is still life, people and liquid , his work has earned him plenty of awards and he has signed contracts with some well known bands over the past six year he is featured in over 200 hundred best advertising photographers, he is now one of the top 10 advertising photographers to this day.


Landscape.

some of the main places that get used in landscape photography are places like lakes, reservoirs and anything with the same concept there are different types of landscape photography there is urban landscape which is like cityscapes and skylines, these images are mainly used to describe and show what a great place it is were they are shooting , this gives the place great detail in one single photo, landscape photography is a photographer trying to get every little bit of the landscape in the image alot of photographers include cars and water in there images to give the image a little bit more personality.

adam burton is one of the main leading landscape photographers and is a very successful author sonce 2008 he has been working in photography as a full time landscape photographer he mainly works in the UK particular southwest of England.


Friday 14 June 2013

mc tech


MC Tech 


For one of our assignments we need to go and take pictures of different parts of the college so we could put the images that we had taken and put them around the college for people who were visiting the college to show them how good the courses are that we offer in the college we got briefed because this would have gave us experience working for a client and let us follow a brief and go out on site and shoot like a real photographer.


Planning 

motor vehicle.


  • 10.00 am - we got told to meet up in our photography room. 
  • 10.30 am - we set off and started to go down to the mc tech part of the college to start our shoot 
  • 11.00 am - when we got down to the mc tech room there was already a group of students shooting so we had to wait for them to be finished before we could work.
  •   11.30 am - the other group finished what they were doing so i started looking around for ideas on what my shoot could be.
  • 12.00 pm - i started planning were my lights would go and how i would want my model standing. 
  • 12.30 pm - i started shooting my model stud underneath his car.
  • 13.00 pm - i finished my shoot and started heading up back to upload my pictures. 

In studio shooting. 

  • 10.00 am - we started by going to lesson to meet with the teacher.
  • 10.30 am - we helped collect the stuff and move it into the studio from the classroom 
  • 11.00 am - we started setting up the studio by setting up the lighting. etc. 
  • 12.00 pm - we started our shoot.
  • 13.00 pm - we finished our shoot. 

Equipment List. 
  • DSLR Camera 
  • Tri pod
  • SD Card 
  • Batteries 
  • Power Cable
  • Lights 
  • Soft Box 
  • Snoot
  • Extension Cables 
  • receivers.

Risk assessments.

Tripping - there is a major risk in tripping when working on a shoot if the wires arent strapped down properly there is a risk in tripping.

Walking into objects - when in a dark studio there is a risk of banging your head in the dark.

eletric shock - you may get electric shocks if you dont do the right procedures you could get electric shocks.

Burns - the lighting in the studios can get really really hot so you need to be careful when your near and around the lighting


i didnt do recci pictures because i was off college for a view weeks if i had chance to go back i ould like to go back and do the recci pictures of the welding scene i didnt get chance to it because i wasnt very well that would have been one of the things that i could change and go back to do.


these are some of the images that i took for my in studio shots that we did for our MC tech i took these images in a studio i dont think the images could have turned out as well as what i thought they could i did not use these images in any of my final edited pictures i did like the one on bottom left so i used one very simliar in my final edited images to get sent down for printing.

Wednesday 12 June 2013

Online Sketch Book

At the beginning of the year we were asked to put all our years learnings together into a scrapbook. We were asked to cover things like compersision, iso and different camera techniques. We were also told in our brief to insert screenshots of us learning how to use adobe bridge when we were creating the contact sheets that we were going to be using for our mc tech. We also went out onto shoots, the pictures we took were also to be included in our sketch book.


Different rules in photography


there is many different rules and stepsa to follow when you are studying photogrpahy some of the main rules are things like the rule of thirds and making sure you have your camera on the right setings before you go out and shoot.


Rule of thirds.


As you can see by the image the rule of thirds grid is on the image to make you see were the lighthouse stands just out of the middle of shot. the rule of thirds is a guidline for many different artists to use but mailny used on photography and video making the rule of thirds splits the picture into 9 different sections both vertical and horizontal lines are perfectly even so all the nine sections are exactly the same. when imagning this rule on the image that is about to be taken you can move the camera to make the rule of third make sense for example in the light house image above the bottom row of cells is low down capturing just a little bit of the surface that the light house is stood on which makes sense when you look at the image because of this grid you can out on the camera or if you just visualise it been there it will make your images better.


Camera obscura


camera obsucura is a device that projects an image and its surrounding on to a a screen but as you can see by the image i have above the text when the camera obsucura project the image it was upside down, this piece of equipment lead on to inspiration of building and creating cameras, which then started photography, how this works is there is a little bx with a hole in one side which can let light pass through,when the light passes through it its a surface inside which then which is reproduced upside down and projected but to still have the colour perserved in the prjection. these were very good for atrists for when they needed to trace something they would project it on to a blank piece of paper which made it easy for the sartist to lightly sketch around the projection. in abut the 18th century they started adding mirrors to the boxs so that the projection would come out looking towards the cieling in which room they were sat in but this feature also turned the image the correct side up when projected back off the mirror.


DSLR Camera Functions


Top of the camera 


As you can see the camera body is been viewed from the top the numbers are pointing at the different functions that operate the camera.

1. the first function labeled number one is to turn the LCD light on incase you are are shooting in low light conditions.

2. AF/WB this option when clicks brings up the white balance and the auto focus options up. so that you can change the white balance and the auto focus when doing different shoots, when you have auto focus on the camera automatically focuses to the main point in the image. 

3. Drive/ISO- when you have it on drive mode it means that you can take single shots or that you can hold down the shoot button and take 5 to 8 frames per second (depending on which camera you buy.) the camera will keep taking images untill you remove your finger or untill the memory on your SD card is full. when you change the iso settings on your camera means that you can shoot in different conditions. 1600-3200 can be used in low lighting to still make a better shot if you have no lighting with you.

4. 


5. Top dial is used for changing through different settings this function is mainly used for going though different functions or changing your ISO settings. 

6. Metering/Flash compensation - the cameras metering system is what you look through when lining up a shot this function measures the light coming through and automatically sets up the cameras shutter/aperture accordingly, because of this feature it makes the image exposure correctly so the camera will captured the whole scene with perfect exposure, the flash compensation button will allow you to fool the camera into thinking the camera will need to give out more light then is actually needed.

7. LCD Screen this screen will display all the features of the camera like the expose settings the ISO settings and many other functions that the camera will have to offer this screen will also allow you to view the images that you have recently taken it also lets you see how much battery life is left on your camera. 

8. Hot shoe is the area were you can places external pieces of equipment for example you can add extra lighting and different lenses that fit on to the camera which will automatically adjust to the camera you own. 

9. Exposure control dial this dial can be used to be creative with your work or as some people would say lazy because of the full auto mode function this option is mainly used for some topics like sport photography or landscape photography this all has built in flash settings and depth of field is all automatic when using this feature. 


Back of the camera 


1. view finder this is were most of the magic happens this is the most important thing about the camera if you have some were to view the images that you were about to shoot you probably would have really bad photographs because you would maybe miss the rule of thirds out pretty much most of the time.

2. Dioptre Adjustment this is brilliant feature if you suffer with bad eye sight this function works like a binocular you can adjust the the viewfinder to match the owners eyesight. 

3. Rubber eye cup this is one of the features that can be removed from the camera but it comes in real useful for people who wear glasses because this can stop the glasses rubbing on the viewfinder which could lead to rubbing or scratching the view finder 

4. Joystick Dial on some cameras have the joystick which can move around the menu or the images in display mode. 

5. Expose Lock/Zoom Button on a cannon EOS 20D this button serves multiple purposes on this camera the first of the multiple purposes if you press record and point this straight at the scene this will record the and keep that exact exposure if you need to re compose and and shoot the rest of your images, this is a good feature if you are shooting into light and want to control over the exposure you can not do this is in manual mode. 

6.Focus Point Selector/Zoom Button on some of the cameras firstly the auto point selector you can choose from many different points and  different circumstances, the camera will the select the best point when viewing the scene has been selected when its in the viewing screen the image will zoom out so you can see all the scene. 

7. Write Indication Light this function will be located in different places on different cameras i light flashes red on the camera it is writing data from exposed images that have just been taken. when the light is flashing and you open the media door and the light is still flashing you could loose all the images that have recently been took. 

8. Jog dial and set button the jog will scroll through the images that are on the camera or items that are on the menu the set button will select a image or select a setting. 

9. On and Off button this pretty much explains the what it does the on and off power button switches on and off the camera it brings and takes away the power to the camera there is more functions like sleep mode when the camera is left on its own and has not been used in a while some cameras will automatically put them into a sleep mode which conserves the battery from wasting. 

10.  erase button this is the same as the last button it pretty much explains itself when you have taken the images that you want and when you go through the images that you have taken the images that you dont know longer want you can simply delete the images straight from the camera by using this button. 

11. play button is for when you may change the function from shooting to filming you can click this button to play the short clip you recorded but you can also use this to start a mini slideshow of the images that you have taken so it plays all of them so you can decide which ones you want to keep and store or delete. 

12. jump button is mainly used for jumping through images instead of scrolling this can be used through images or it can be used to jump through settings.

13. info this button when clicked to show the information of the image things like the size of the image what format the image has saved as the date the time if the flash was used when the image was taken just all the general information about the image. 

14. menu button when this button is clicked it brings up the internel menu on the little screen on the back of the camera this lets you choose the settings you want to use on the camera. 

15. screen this feature is usally used the to display menus images and different aspects of the technology inside the camera. 


1. lens alignment each lens will have a similar red dot which means when you are screwing the lens on to the front of the camera when the dots align it means the lens is clicked into the camera you insert the lens by a twist motion until it clicks. 

2. flash pop up is located on the top of the camera this functional is mainly to be used it you have the samera on auto so when the camera doesnt see much light the camera automatically makes the flash pop up so that the image is more clear and isnt dark. 

3. lens release is a little button located just at the side were the lens locks in when you want to change lens or when you want close down your camera and pack up your things you push this button to release the lock so you dont snap anything inside the camera. 

4. depth of view preview. the depth of field depth of view measures on how much of the image is in focus for example if you took a picture of somebody stood infront of a mountain from a distance its most likely that the mountains in the background wouldnt be as clear as the person stood closer to the camera because the camera focusing on the object which is closer to the lens of the camera. 

5. lens contacts these line up with any compatible lenses for the camera you own this makes it so when the auto focus and other settings will still work even though its not the original lens that came with the camera. 

6. mirror lets you see through the viewfinder because of the reflection coming off the mirror how this works is when you look through the viewfinder you look down off to mirrors which reflects things ut because it comes of to mirrors it makes the image come through the camera in the correct direction. 

7. Grip is the rubber Part on the side of the camera which you hold onto when you are taking pictures without using a tripod. 

8. shutter release button this button takes the pictures if you start to do a half push it sets in the auto focus before the image is actually taking. 

9. focus assist beam most DSLR cameras now come with a feature that when the lighting on the camera it assists the lighting in the camera to create a more clear image. 

10. Pop up flash most professional DSLR cameras have a built in flash when the cameras is on the function fully auto the flash will pop up and fire when required. 


DSLR base 

1. battery compartment this is were the batterys are kept as you could have guested throught the sub heading but this is also the home of were he SD cards slot in to the camera so they can store all the images that are about to be taken, the thing with DSLR cameras is if you dont have good batterys the batterys can die or run out of charge pretty quick so its always handy to keep a spare set of batterys in the camera bag. 

2. Tripod socket this is were you insert the base off the Tripod this goes into the camera by a screw which has threads then it slides on to the top of the tripod and is its been placed in right it will keep it in a nice safe secure place so the camera will not fall off the tripod. 


Preparing to set up a camera before a shoot 

 when you are setting uo your camera  before you go on a shoot the most important thing is knowing what type of shoot you are going on because there is obviously different styles of setting up for different shoots for example you wouldn't set up your camera for a out door shoot if you are going to be working in a studio. 

the first thing you need to do when setting up your camera for any shoot is to make sure that the batteries that you have are fully charged and you have spares or you have a wire to leave plugged in to the laptop and keep it on charge as you are using the camera in the shoot, when you go to a shoot you will have to make sure the lighting is right before you start setting up your ISO setting and the aperture on the camera, some things are pretty basic things that you will automatically check without even thinking about like your lens you will automatically check the lens and not even really think about it but you always need to do it before going out on a shoot because you don't want to get out on the shoot and realize that you have brought or picked up the wrong lens for the shoot. 

make sure the memory card in the camera is empty before you go on the shoot and make sure you have a spare memory card in your kit bag just in case the shoot goes on longer than expected and you need to take more shots than what you planned so just to make sure you have enough disk space rather clean your memory card blank or take spares just in case you fill up your primary memory card and not even think about how fast you have done it because when you on the set you don't have time to sit and go through the photos on your camera and delete the images that you don't want to keep. 

if your doing a soft light studio shot when you have set all your soft boxes around the set you need to get the receivers out of your kit bag and put them into the back of the lights and set them all to the same setting and put the transmitter on the top of your camera before you start doing test shots make sure you have the house lights turned down to the right lighting what the client wants then when you start doing your practice shoot you will have make sure the ISO settings will be right with the ones you have set up on the soft box lights so when the flash goes through the soft box the lighting on the model is perfect then when you have all your lighting set up and your camera safely and stably set up on the tripod find the right angle you want to start shouting from and then steady the camera and start shooting away as a few test shots to see how the images are coming out if things still aint going right with the lighting of the room maybe try turning up the ISO settingg on the camera and on the lights so more exposure gets in tot he lenses and takes a more clear accurate images . 


Aperture depth of field 


Depth of field is a the front to back zone of an photograph which makes the become razor sharp, as soon as the object starts to move out of range, when the object starts to go out of range the object starts to loose focus, there are 2 different ways to describe the qualities  of depth of field the name of these 2 is Shallow DOF or Deep DOF, when DOF is shallow is when the range of focus is very narrow, not much maybe a couple of inches to maybe a few feet. The Deep DOF is it could b as many yards as 6-7 yards to infinity in both cases the DOF is measured from the focus point. 


Shutter Speed 


shutter speed is the effective length of time that the shutter is open is the exposure time which allows the light access the image sensor. multiple shutter speed and aperture do they same things and let in the same amount of light when you half the shutter speed it doubles the exposure that comes in through the lens, the shutter speed can be used to slow down fast moving objects a lot of photographers use different shutter speeds and fast moving sporting events so they can slow down the action and get a better shot on what is happening at the event the way you do this with the shutter speeds is make the shutter speed really short so that it can capture the images quicker. 


ISO International Standards Organisation


The iso settings is to control the light sensitivity which allows how much light will be at the shoot for example if you are shooting in a studio you will hook up the lighting to the back of your camera by using receivers which plug into the camera and into the light. you have to set your ISO settings to match the lamps or when you shoot it will give out to much light and it could mess up all of your images that you are taking on the shoot on the day. 

Tripods 

Tripods are a brilliant thing to use in photography they can really stable the camera when you are trying to get a very clean image these are also good because of the fact you can out the camera on the tripod and leave it while you are moving things around the shot without having to move everything at once. 


Studio Lighting Techniques 

Setting up lights on a shoot can be pretty dangerous if the wires are taped down correctly when you have set u the lighting they can be very easy to trip over especially if the lights are off and you could walk into things that are holding the lights just incase you cant see them when you are in the dark shooting you could poke yourself in the eye on the stands that hold the lights. 

light shapers, there are many different types of light covers which all do different types of things for example the soft box lets out just a soft lighting so it just gives a nice soft glow on the model that you are taking images of. there is also a a lighting fitter that is called a snoot which sends the light out of a smaller light which makes it lighter on one section it points the light at a certain section. 


Photoshop
 
 
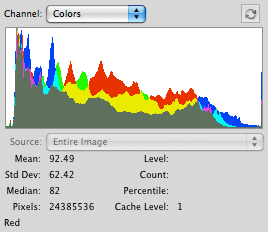
in the new editoin of adobe photoshop cs6 this feature is named a histogram this is a panel which shows the tonal range, this tool works by showing a graph of 256 brightness livels in a image in the graph i have got as you can see the levels are going up and down in like bar motion along a vertical axis, the higher the line is away from the axis means it more dots with the brightness.


None destructive work flow.
 
none destructive work flow means before you edit the image that you originally have you would insert a new layed becaue you can test what you want to happen on the new layer and if things dont go the way you plan them you can delete the layer and still have the originall image that is on the orginal layer on photoshop


Monday 12 November 2012


Application of photography 

Research into wildlife photography.


There is probably no more challenging topic for photographers than wildlife photography, it takes a lot of time for sitting and waiting for the perfect shot, this is because wildlife is so unpredictable, this is why it is so popular because wildlife photographers bring back evidence from the wild showing us stuff that happens in the wild that you wouldn't even think would happen for example i found this picture of a monkey toy fighting and playing with to baby tigers which you would think that the tigers would have just attacked the monkey for a meal.

The difference between wildlife photography and other topics in photography is that you cant just point your camera towards a building/bridge you have to go out into the wild with all different types of equipment dragging that around in the forests, jungles, deserts and many other places.


Gannet jacuzzi


This image is a brilliant image that was taken by a man from Southampton this image won the British wildlife photography award, This image was taken just off the north coast of Scotland, the image was taken by Dr Matt Doggett, 'Gregg Armfield one of the world wild fund. said that this image is striking' i found this comment about the image on the BBC website, this website was good for information,  i really do like this image its been captured brilliantly its good how the photographer must have been under the water, but i can imagine that this was a lot of waiting around looking for the perfect opportunity.

This competition has had the most entries this year with different images from all different types of wildlife photography, the competition got launched in 2009 and it has been a hit every year since it had been launched.


This image has won one of the wildlife photography competitions the name of the the image that was sent it is called frog looking after frog spawn, this image was took by an 8 year old boy who is still in school, this image was marked in the category for people aged 11 and older because the image was such a good image, i to my self like this image for similar reasons to what the photographer said he said he likes the way the light reflects of the water , but i like the way he caught the frog looking over its spawn this would have been perfect timing to say he took this image in his back garden, this image was taking in march last year.

Photography equipment 


some outdoor photography gear has been designed to blend in with the surroundings  so the animals in the wild wont be able to see the photographer in the wild hiding, if the animals seen the photographer they could be scared and they could run away and that would ruin the whole project and if the photographer has been waiting for a long time to get a picture and then gets spotted things could go wrong and he will never get the image.


Where is wildlife photograpghy used most?


wildlife photography is used in many places a lot of the time it is used for education purposes, there is loads of books in the library for research that you can go look in, wildlife images will be really popular with books like science, for when they have pictures of plants been pollinated by bees or stuff like the food chain, for example.
images like this will most of the time be found in science books as you can see in the image the honey bee is extracting the pollen from the flowers to take back to the hive for the queen bee.


thease images could also be used in science posters on the walls of schools and maybe colleges showing the students why bees are a vital part of the nature world because bees a going extinct fastly and knowbody really knows the reason why the insects are slowly dispearing, this image will have taken some great waiting time the photographer who took this image may have had to wait a long time before they had got the photograph that they had wanted, i like this image because the camera that has been used has spectacluar image quality you can see every bit of detail of the bee extracting the honey from the flower.


wildlife photograpgy will be used in the younger sccools so that the teacher can teach the children which animal is which, because if there wasnt any images of tigers children who live far away from the wild for example if some one from new york city had never seen a image of a tiger at such a young age they would most proberly not know what one is because there isnt many wild tigers in new york city.

wildlife images are also used in books and magazines for people to see what is happening in different countries around the world.

equipment 


Canon EOS 7D and EOS 60D cameras


this camera has been said to be one of the most impressive cameras with many different features some may be the crop factor and many more the 7d is the more expensive of the 2, cameras the eos 7d body is on sale in many places for £959.98 which is a brilliant camera for the price for wildlife photography.This camera is one of the main cameras used by professional wildlife photographers, according to the ratings on  the websites they say this is one of the best cameras that could be used for capturing wildlife at the exact point and they take fantastic images. 


History of wildlife photography. 


This image is the first national geographic wildlife photograph took this was taking by a man called George Shiras III this image was taking in 1905 when George was serving a term in the U.S house of representatives, He agreed to in order to help reform movement in his native Pennsylvania.


Pros and cons 

There is many pros and cons about wildlife photography most of the cons would have something to do with having to sit around for long amount of times and wait for the perfect image they need to do a lot of outside work this work could also be in all weather and all around the world, some more of the cons are the weathers all around the world some of the shots they might need could be in the blistering heat or the freezing cold, i think to do this profession you would need to be really patient and very calm headed.

The pros of doing this type of photography would be the amount of travelling around all different places in the world just to get the perfect shot and all of the different experiences you would be able to live and see first hand, you would be able to visit some of the countries that you never thought you would be able to go see if you weren't doing this job.

Lighting


The main lighting in the wildlife photography sector is mainly the natural light from were the image is shot this is because there is no point in taking a plug in light soft-box to the wild because it isn't going to be much use when your out in the wild 2 things that will not be good with taking your own lighting will be there will be no were to plug the lighting in and the soft box wouldnt make a huge difference when your out in the wild.


Wildlife photography is very challenging because if the photographer cant get the right exposer it could ruin the full image that the photographer has been working on. Some types of animals in the wild can be hard to approach and could be very aggressive or territorial e.g. lions can be very aggressive when approached, when they have there cubs near by. Craig Busch has broke this barrier by being a part of the lions family.